Tips
for photographing insects and mites
Even inexpensive digital cameras are capable of
producing excellent photos of small objects
like insects and mites when used correctly.
Unfortunately, the camera in your cell phone may not
work since most cell phone cameras don't have a
true macro/micro setting that allows you to focus on
small objects (see Tip#1).
Tip#1 Focus - poorly focused, blurry images are
the biggest problem I see. To get closer than about 12"
(exact distance varies with camera) you may need to
switch your camera's "mode" to "Macro" or "Micro".
This setting allows you to move the camera very close to
the subject and still get sharp images. The mode setting
switch is often marked with a flower/tulip - check
your camera manual. Sometimes when the camera is
in macro mode the focus is fixed at a certain distance.
In this case you'll need to move the camera toward the
object until it is sharp. Finally, make sure the camera
is pointed at the subject when the auto-focus is
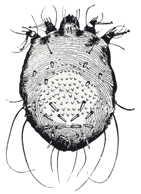
activated (shutter pressed). See the image of the bird
mite here
for an example of macro mode, close-up photography.
Tip#2 Lighting - Many images sent to us are too
dark. One simple solution is to use an ordinary
flashlight to light your subject. See the image of the
tick here for
an example where we used a flashlight to add more light
to the subject area.
Tip#3 Exposure - This is a bit more complicated
and can result in images that are either too dark or
too light. Keep in mind that the camera's exposure
meter "assumes" that you are pointing the camera at a
subject of "average" brightness ("middle grey") so if
your subject is on a white background, such as a white
wall, the camera will automatically darken the scene,
and if your subject is on a dark surface the camera will
lighten the scene, often making your subject too bright.
Proper exposure is easy if you follow this simple
trick: Place the palm of your hand near your
subject, facing the camera. The trick here is that your
palm, regardless of your skin tone, is pretty close to
the "average subject" that was used to calibrate the
light meter at the factory. So if you point the camera
at your palm and lock this exposure, usually by
partially depressing the shutter release, the auto
exposure will be set correctly. Now, without lifting
your finger off the shutter release move the camera to
your subject and take the picture. This might take some
practice but it is not hard once you get the hang of it.
|

